Issue 32 • Engine & Transmission Tips
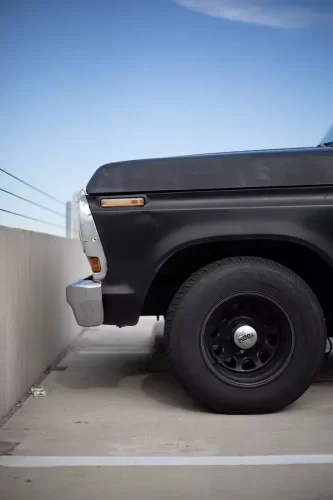
Get pro results turning your wheels into the super popular matte black look!
You’ve got what were once really nice rims on your ride, but now they’re showing their age. Don’t replace them… PAINT THEM.
That’s right! You can achieve a very similar matte aluminum finish on your rims that will look as nice as the original. But, even better, you can spray them matte, semi-gloss, or gloss black for that cool “black-out” look everyone loves so much right now.
The trick is to do it right, so your rims don’t scuff or scratch under normal wear and tear.
“Do it right” mostly entails using the proper products, and taking your time.
First, we need to talk about products, particularly the paint you will want to use. You will get the best result using products specifically made for automotive applications. While it might seem like a scam to some of you, they are formulated to perform better under circumstances that are specific to driving and the elements the products will be exposed to. For instance, when painting your rims, you actually want a primer and paint that will perform in extreme temperatures. Vehicle rims have to weather sub-zero Winter nights and the incredible heat dissipation needed on a 100+ degree Summer day.
More on that later in the painting section of this article.
For now, you have a big decision right off the bat. Whether to paint your rims with the tires on, or off. Several of the videos we watched offered pretty impressive results doing the work with the tires on, and some, even with the rims still on the car. This is entirely up to you. If you have the luxury of working on your rims without the tires in place, that will yield the best-performing results.
Cleaning
Cleaning your rims, outside and inside, is very important. It’s not critical if you don’t care about the paint in a few years. But generally, a thorough cleaning is an essential first step. Use a detergent/cleaner specifically designed for your type of rim. Most are worthy but some will completely remove the grim, and possibly some of the finish if used aggressively. For a rim in fairly good shape, use a non-metal bristle brush and ScotchBrite pads to get into all groves and crevasses. (No need to create scratches you’re going to have to sand out later.)
For rims with decay in the metal, (usually bubbling), the wire brush, and even wire wheels attached to a drill, will make quick work of getting to the paintable metal. Real steel wool is a reliable tool as well.
When your wheels are yuck-free, rinse them with a power washer, and then dry them thoroughly with air from a compressor.
 Taping
It is important to protect the tires and surrounding surfaces of your vehicle if you are painting your rims on the car. Using high-performing masking tape will ensure that it doesn’t start lifting when you start painting. The best practice for masking a tire against its rim is to lay down the tape with a 1/8 to 1/4 inch overlay protruding up onto the rim, and then tuck the tape in under the rim with a plastic putty knife. Then burnish down the tape, (press really hard,) and apply another layer working your way away from the rim to the point where you can use paper to protect the tires and surrounding areas.
Sanding
Just like our other DIY articles, sanding is a methodical process where you start with a more aggressive grit sandpaper and work your way through finer and finer papers until you are basically polishing the surface instead of taking material off.
Best practices are to work on perfectly flat surfaces with a block behind your sandpaper, and all other surfaces with your fingers.
You might have to start with 120 or 180-grit sandpaper to smooth out rough areas. NOTE: The higher the number, the finer the grit of the sandpaper. After your initial pass, go over all those surfaces with 220, then 320. You can even go up to 400 or 600 if you can still see scratches that bother you. Remember to wipe down your sanding surfaces with a clean microfiber cloth. You can soak it in rubbing alcohol if you like, but stay away from water after the cleaning stage.
When your rims are sanded to your satisfaction, we recommend wiping them down with Acetone just before applying your primer. This will provide the cleanest possible surface and the best adhesion.
Priming
Painting starts with primer. And you’re going to start with an automotive etching primer. This type of primer is formulated with phosphoric acid and zinc, which bond with the surface as it touches it, forming a more-solid connection at the molecular level, with each coat. It must be sprayed on bare metal to be effective at preventing rust. It is not recommended for multiple layers as build-up primers are.
If you have more skills, you can also apply Epoxy Primer over the self-etching coat to offer greatly enhanced protection. Though, epoxy primer does take time to “cure”, versus just drying.
 Painting
The specific paint you choose will be dependent on several factors, including the finish you want, and your desired durability.
Out top pics are from different manufacturers and each has its advantages:
- VHT Gloss Wheel Paint is a polyurethane product designed for steel or aluminum wheels and can withstand harsh environmental conditions. This is the most durable of any wheel-specific paint.
- Dupli-Color Hyper Silver Coating is specifically for making your steel or aluminum rims look like their original silver finish. It comes with a clear top coat formulated to match the color coat.
- Rust-Oleum Automotive High-Performance Wheel Paint, is an oil-based product that works on metal and plastic surfaces, resists corrosion well, and is affordably priced.
An important finishing step is applying a clear coat over your new paint. Depending on the type of color coat you applied you may need to wait as long as several days to apply a clear coat properly. Regardless, we recommend using a clear coat product from the same manufacturer as your color coat, and preferably from the same product line, hopefully ensuring ultimate compatibility and durability.
Protecting
As we all know, wheel rims, regardless of being new or restored are susceptible to scuffing, scratching, and other abrasions, often related to street curbs. Your best practice here is to learn how to parallel-park. LOL And second, more seriously, is to get a tire that’s slightly wider than the rim it’s mounted on, so the sidewall of the tire protects the rim.
NOTE: We have found that some shops are particularly hard on rims when changing tires, (especially low-profile tires). You will benefit greatly if you ask the shop foreman or technician to take special care with your painted rims. Actually, a $10 or $20 advance tip will go a long way in protecting your investment.
In conclusion, we are positive you will be happy with the results of painting a vehicle’s wheels or rims. You should be especially happy with the amount of money you will save on new rims. And, Fraser Super-Tip for this article is to shop on Craig’s List or Facebook Marketplace and find a used set of rims that appeal to you, even if they’re in pretty bad condition, and use this technique to make them awesome again!

 Taping
 Painting