How to Restore Hazy Headlights Like A Pro
Issue 18 • Engine & Transmission Tip You Can Restore And Protect Your Hazy Headlights Yourself Here is a DIY (do it yourself) project that

First, understand that DIY (Do It Yourself) solutions for repairing scratches or paint chips on your car will vary greatly according to the quality of the products you use, the severity of the damage to your paint, and your ability to follow instructions patiently.
For the purposes of this article, we are not going to address severe paint damage that would require filler, extensive sanding, primer, multiple color coats, and a clear top coat.
With that in mind, here are Fraser Engine Co’s abbreviated recommendations on using touch-up paints for scratches and paint chips smaller than a pencil eraser.
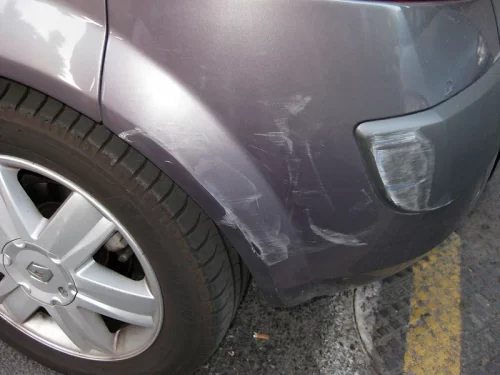 The first thing to do is determine the severity of the damage to your paint.
Once you know what level of damage you are dealing with, you can select the appropriate product to work toward an acceptable repair.
There are three types of DIY touch-up paint applications available, paint pens, brush-in bottles, and aerosol spray cans.
Automotive paint pens are virtually identical to those metallic pens you use at Christmas time, where you shake the pen, and the weight inside slides back and forth mixing the contents. Then you press the tip down and some paint comes out for you to spread around. The trick to using paint pens is PRACTICE. Use a bare surface similar to the one you’re repairing, a piece of flat metal would be ideal. Apply the paint from the pen to a second surface, like a plastic coffee can lid. Spread the paint around with the pen tip to see how it covers and how fast it dries. This will make you far more skilled when it comes to the actual repair.
NOTE: All paint pens are not created equal, so be sure to use a reputable product like those from AutomotiveTouchUp.com or ExpressPaint.com or DupliColor.com. Some paint pens have ‘press-the-tip-to-apply-the-paint’ applicators. Others have brushes like the bottles. Some even come with an abrasive tip in the cap, to clean out a scratch before applying the paint. The latest wave has your desired color in one end, and a clear coat applicator in the opposite end of the pen, which is just a smart convenience. The Dupli-Color Scratch Fix All-in-1 has all three in one pen, and the applicators include a fine brush for the color and a pointed sponge for the clear coat. In any case, paint pens can produce fantastic results, even for the novice.
Brush In Bottle paints are a little trickier to use, and often the applicator in the bottle is very caveman-like. The touch-up kit we purchased included fine artist brushes which made the application far more precise. (This is why some manufacturers are now just providing the paint in a small jar, with no cap-mounted brush.)
Graduating to serious repairs, you may need to use a spray aerosol application. This is high-quality automotive paint packaged in what looks like an everyday spray paint can. The application is almost comparable to that of a body shop’s professional paint sprayer, but rest assured, the keyword is almost. The type of repair that would warrant a spray application will almost certainly require a bondo-filler and several coats of primer first. (This process is outside of our article’s scope.)
 If your scratch seems light, it may only be in the clear top coat. Test it by wiping the paint with rubbing alcohol. If it completely disappears, it’s only in the clear coat. That’s great because you can go to the auto parts store and get two rubbing compounds, medium, and ultra-fine. Follow the instructions and you should be able to ‘buff’ out the scratch. If that doesn’t completely work, you may be able to add a clear coat from a pen to fill the damage and buff that out to make it disappear.
If the scratch or chip is down to the color, primer, or even bare metal, you can still use a paint pen, but more work is required to achieve the results you want. Here are the steps:

Issue 18 • Engine & Transmission Tip You Can Restore And Protect Your Hazy Headlights Yourself Here is a DIY (do it yourself) project that

Issue 34 • Engine & Transmission Tips There is more to winterizing your car than adding winter wiper blades. The smart driver does a set
Issue 12 • Engine & Transmission Tips The Ford Triton engine is a 5.4-liter V8 that was primarily designed to power full-size trucks and sport

Part Three of a Three-Part Series Gone are the sweeping, curvy lines. In bounces the Tumbler Introducing The Tumbler Gone are the sweeping curves of
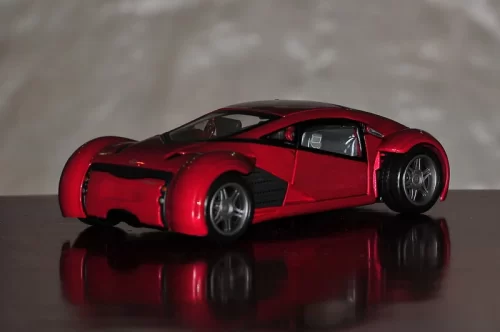
Featuring A Genuine, Fully-Functional Lexus 2054 Concept Car In this film, the car will certainly outlast the star! The Lexus 2054 is a movie concept
Issue 30 • Engine & Transmission Tips Hey! Great! You’ve decided the Fraser Engine Co. remanufactured engine (or transmission), is the one for you. But,